First Run
After installation, start with the Admin Console. This is where you prepare the content and behavior that will appear on your poster display.
First-run checklist
- Open PosterFlow Admin.
- Activate Early Access if prompted.
- Choose or create your poster library location.
- Add poster artwork or connect a supported metadata/content source.
- Review the library grid and confirm posters appear as expected.
- Open display settings and choose the monitor or display behavior.
- Customize banners, info bar, brightness, transitions, or layout if desired.
- Use Push Live or the current display workflow to send the configured experience to the Display Client.
Admin Dashboard
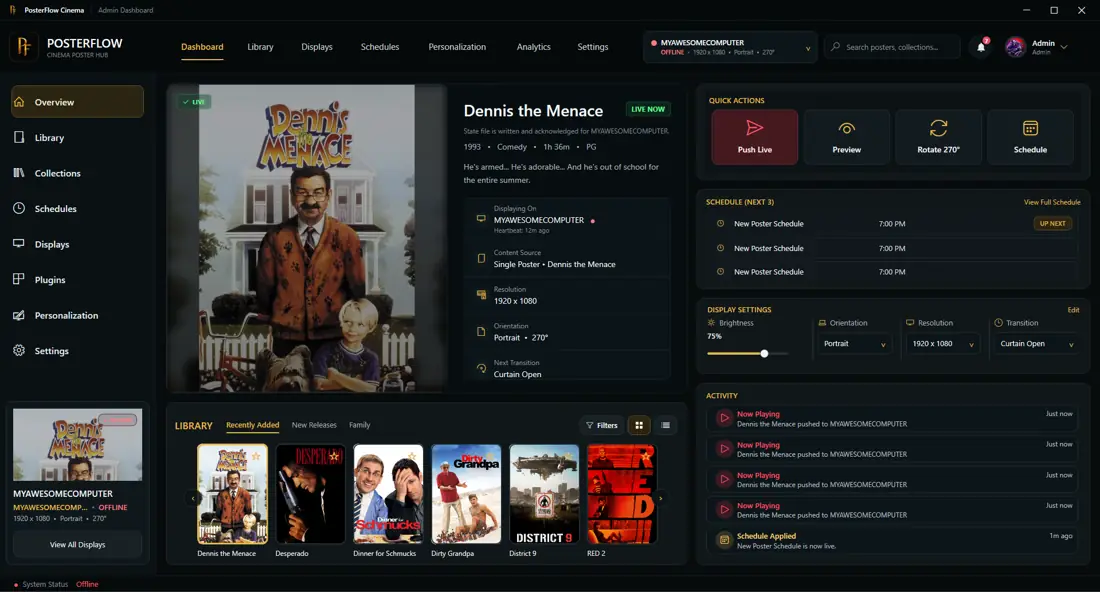
The dashboard is the practical starting point for day-to-day use. It should lead you to library management, schedules, displays, personalization, plugins, and support/update areas.
Library first, display second
If the display screen opens but does not show what you expected, return to the Admin Console and confirm:
- the library contains posters
- the selected mode is correct
- the intended collection or schedule is active
- the correct monitor/display is selected
- the Display Client is running
Good first test
For a first test, keep the setup simple:
- add a small number of posters
- confirm they appear in the library
- start the Display Client on one monitor
- push the default view live
- then add schedules, provider mode, or personalization after the basic display works